Hey Guys come join us for our grand opening ribbon cutting at Haley's Homemade Sandwiches tomorrow 7/10/12! Free Food 3pm-5pm!
located @ 1569 Parkway Ave
Ewing NJ 08628
609-883-0838
Monday, July 9, 2012
Thursday, February 16, 2012
Homemade Soft Pretzels w/ horseradish Mustard
One of my favorite snacks of all time is pretzels. Thick or thin hard or soft, I'll take a pretzel anytime. Although I won't discriminate against any one kind of pretzel, my favorite are hot soft pretzels. After experimenting for a while i have come up with a winning recipe. You can make these as traditional twisted pretzels, or form them into rolls to use for burgers or cheesesteaks and such. Here is what you will need:
Combine the water, sugar and salt in a bowl. Sprinkle the yeast on top. Let is sit for 5 minuets or so, until yeast starts to bubble. Add the flour and melted butter. Using a dough hook on a stand mixer or hand mixer with dough hook attachment, slowly mix together. Increase the speed to medium for about 5-6 min, or untill the dough pulls away from the bowl. Take the dough out and hand knead it for about 5 more min. Form the dough into a ball. Coat a tablespoon of vegetable oil in a large bowl. Coat the dough in the oil from the bowl and cover with a damp towel. Set the dough in a warm dry place and allow the dough to double in size. This should take about an hour.
Preheat the oven to 425 degrees.
Fill a large pot with water and start to boil.
Lightly brush oil on 2 sheet pans.
When dough has risen. place on a lightly floured surface and hand knead for another 2-3 minutes until the oil is incorporated. Divide the dough into 8 equal parts. Using your fingers hand roll each piece into even ropes. They should be about 22" long.
Make a U-shape with the rope, holding the ends of the rope, cross them over each other and press onto the bottom of the U in order to form the shape of a pretzel.
After all 8 pretzels have been formed, add the baking soda to the boiling water. Add each of the pretzels, 2 at a time to the water. Let them boil for a min and flip them over. (they will float) Boil for another minute. Remove the pretzels will a slotted spoon or a spider and place them on the baking sheets. When all the pretzels are boiled, brush the egg wash on each one and top with the salt.
Place the sheet pans in the oven and bake for about 15 minutes until golden brown.

Serve the pretzels warm with horseradish mustard for dipping.
Horseradish Mustard:
.JPG)
- 1 1/2 cups warm water
- 1 tablespoon sugar
- 2 teaspoons kosher salt
- 1 package active dry yeast
- 4 1/2 cups bread flour, approximately
- 2 ounces unsalted butter, melted
- Vegetable oil, for pan
- 2/3 cup baking soda
- 1 large egg yolk beaten with 1 tablespoon water
- Pretzel salt
Combine the water, sugar and salt in a bowl. Sprinkle the yeast on top. Let is sit for 5 minuets or so, until yeast starts to bubble. Add the flour and melted butter. Using a dough hook on a stand mixer or hand mixer with dough hook attachment, slowly mix together. Increase the speed to medium for about 5-6 min, or untill the dough pulls away from the bowl. Take the dough out and hand knead it for about 5 more min. Form the dough into a ball. Coat a tablespoon of vegetable oil in a large bowl. Coat the dough in the oil from the bowl and cover with a damp towel. Set the dough in a warm dry place and allow the dough to double in size. This should take about an hour.
Preheat the oven to 425 degrees.
Fill a large pot with water and start to boil.
Lightly brush oil on 2 sheet pans.
When dough has risen. place on a lightly floured surface and hand knead for another 2-3 minutes until the oil is incorporated. Divide the dough into 8 equal parts. Using your fingers hand roll each piece into even ropes. They should be about 22" long.
Make a U-shape with the rope, holding the ends of the rope, cross them over each other and press onto the bottom of the U in order to form the shape of a pretzel.
After all 8 pretzels have been formed, add the baking soda to the boiling water. Add each of the pretzels, 2 at a time to the water. Let them boil for a min and flip them over. (they will float) Boil for another minute. Remove the pretzels will a slotted spoon or a spider and place them on the baking sheets. When all the pretzels are boiled, brush the egg wash on each one and top with the salt.
Place the sheet pans in the oven and bake for about 15 minutes until golden brown.

Serve the pretzels warm with horseradish mustard for dipping.
Horseradish Mustard:
- 1/2 cup spicy mustard
- 3 tbsp horseradish
.JPG)
Tuesday, October 11, 2011
Eggplant Rollatini
There are a millions of variations on the classic eggplant rollatini. It is basically eggplant stuffed with something (usually cheese) rolled and topped with sauce. Some are simple and bland, this one is not. The flavor combinations of my recipe work perfectly together. Here is what you will need:
2 medium size eggplant
5 eggs
3 cups seasoned flour (recipe to follow)
Olive Oil
1 cup riccotta cheese
1/2 cup shredded Fontina Cheese
1/2 cup grated Parmesan Cheese
1/4 lb Proscuitto
1/4 lb sliced Meunster Cheese
1 oz chopped flat leaf parsley
1 oz Chiffoned Fresh Basil
Coarse Kosher Salt
Homemade Marinara Sauce (see marinara blog post)
Seasoned Flour:
3 cups all purpose flour
1 tbsp baking powder
2 tbsp paprika
2 tbsp garlic powder
2 tbsp onion powder
2 tbsp ground tyhme
1 tbsp cayenne pepper
kosher salt
fresh ground pepper
First take the 2 eggplants. Chop the ends off and peel the skin off.

Then cut lenth wise into thin slices. If you have a meat slicer or madolin it is much easier, and keeps all the slices uniform. If not, just use a serrated knife.

Lay the eggplant slices on sheet pans or parchment paper, then sprinkle the coarse kosher salt on top of each slice. This will bring the moisture out of the eggplant and will also make them less bitter.

Let them sit for about ten minutes, than remove the salt by dabbing the eggplant with a damp paper towel.
Now we will set up a breading station. Some people use breadcrumbs for this, I like to use a seasoned flour. Set up 3 trays. Put the seasoned flour in 2 of them, and 4 of the eggs in the 3rd.

We are now ready to bread the eggplant. Dredge each piece in the seasoned flour mix, then the eggs, then the flour. I like to do 4 or 5 at a time, cook them, then do 4 or 5 more. The flour seems to stay on them better if they don't sit for a while.
Now we cook the eggplant. Coat the bottom of a large skillet or frying pan with olive oil. Bring heat to med/ high. When the oil is hot enough, put 4 or 5 eggplants in. Don't put too many in. You don't want to crowd the pan. Fry on each side until the are brown and crispy, usualy about 2 and a half minutes on each side.


Now to make the filling. In a metal bowl combine the Ricotta, Fontina, Parmesan, Basil, Parsley, and remaining egg. With a spoon thoroughly mix the ingredients together.


If you aren't going to eat the rollatini now, you can cover and refrigerate them. If you are gonna eat them now, and you will want to eat them now! This is the final step.
Set your oven to broil on high. Lay as many rollatini's as you need on a baking sheet lined with foil. Top each rollatini with two slices of Meunster cheese. Put them on the top shelf directly under the heat. Cook until the cheese is bubbly brown. Should take about 3 to 4 minutes.
Place one eggplant on a plate and top with homemade marinara sauce and some grated parmesan and some parsley. You can now dive in!

2 medium size eggplant
5 eggs
3 cups seasoned flour (recipe to follow)
Olive Oil
1 cup riccotta cheese
1/2 cup shredded Fontina Cheese
1/2 cup grated Parmesan Cheese
1/4 lb Proscuitto
1/4 lb sliced Meunster Cheese
1 oz chopped flat leaf parsley
1 oz Chiffoned Fresh Basil
Coarse Kosher Salt
Homemade Marinara Sauce (see marinara blog post)
Seasoned Flour:
3 cups all purpose flour
1 tbsp baking powder
2 tbsp paprika
2 tbsp garlic powder
2 tbsp onion powder
2 tbsp ground tyhme
1 tbsp cayenne pepper
kosher salt
fresh ground pepper
First take the 2 eggplants. Chop the ends off and peel the skin off.

Then cut lenth wise into thin slices. If you have a meat slicer or madolin it is much easier, and keeps all the slices uniform. If not, just use a serrated knife.
Lay the eggplant slices on sheet pans or parchment paper, then sprinkle the coarse kosher salt on top of each slice. This will bring the moisture out of the eggplant and will also make them less bitter.
Let them sit for about ten minutes, than remove the salt by dabbing the eggplant with a damp paper towel.
Now we will set up a breading station. Some people use breadcrumbs for this, I like to use a seasoned flour. Set up 3 trays. Put the seasoned flour in 2 of them, and 4 of the eggs in the 3rd.
We are now ready to bread the eggplant. Dredge each piece in the seasoned flour mix, then the eggs, then the flour. I like to do 4 or 5 at a time, cook them, then do 4 or 5 more. The flour seems to stay on them better if they don't sit for a while.
Now we cook the eggplant. Coat the bottom of a large skillet or frying pan with olive oil. Bring heat to med/ high. When the oil is hot enough, put 4 or 5 eggplants in. Don't put too many in. You don't want to crowd the pan. Fry on each side until the are brown and crispy, usualy about 2 and a half minutes on each side.
Set out paper towels and place the fried eggplant on them. This will soak up any excess oil. Sprinkle the cooked eggplant with salt. Repeat this process untill all the slices are cooked.
Now to make the filling. In a metal bowl combine the Ricotta, Fontina, Parmesan, Basil, Parsley, and remaining egg. With a spoon thoroughly mix the ingredients together.
Now it's time to assemble the rollatini! Take two pieces of eggplant and lay them next to one another, slightly overlapping. It will just kind of form 1 bigger eggplant piece. Now take a piece or two of the proscuitto, and layer it on the eggplant. Now, with a knife or spoon, spread a layer of the cheese mixture on top of the proscuitto.
It's time to roll! Gently roll the eggplant. Be careful not to roll to tight or the filling will fall out. Repeat this process untill all the eggplant is stuffed and rolled.
If you aren't going to eat the rollatini now, you can cover and refrigerate them. If you are gonna eat them now, and you will want to eat them now! This is the final step.
Set your oven to broil on high. Lay as many rollatini's as you need on a baking sheet lined with foil. Top each rollatini with two slices of Meunster cheese. Put them on the top shelf directly under the heat. Cook until the cheese is bubbly brown. Should take about 3 to 4 minutes.
Place one eggplant on a plate and top with homemade marinara sauce and some grated parmesan and some parsley. You can now dive in!
Wednesday, September 28, 2011
Homemade Pasta
If you have ever had homemade fresh pasta, you will never want the hard stuff from a box. It's a lot easier to make than you think. I'm gonna make it even easier. Instead of a messy pile of flour on your counter top, we are gonna make it in the food processor. I know it's not as authentic as getting your hand messy, and I'm sure some old Italian Lady would slap me, but my way tastes the same and takes 1/10 of the time. Here we go! This is a basic recipe. I'll let you know later how to make flavored pastas, like spinach, roasted pepper, ect. another time. This is all you will need:
2 cups all purpose flour
2 large eggs
salt
1 tbsp olive oil
OK, combine all the ingredients in your food processor.

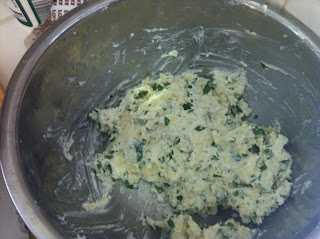
Pulse about 10 to 12 Times. Take a little piece of the dough between your fingers. If it binds together well, (meaning not to dry that it crumbles apart, and not to soft and moist that it is mushy) you are ready to go. If its too dry add a couple of tablespoons of warm water, and pulse a few more times, to get the consistency right. If it's too wet, just add a few more tablespoons of flour. Once you do it a few times it gets easier.
the dough should look like this.

Sprinkle a little flour on a cutting board. Then dump to dough on top.

Now knead the dough into a ball.

Cut the ball in half. Then roll dough out with a rolling pin. About the width of your pasta machine.

Now it's time for the pasta maker! Set your machine on the widest setting. Now feed the dough through. You may have to run it through the widest setting a few times.

Repeat this process, narrowing the setting each time, until you get the desired thickness of your pasta sheets. Today I'm making Fettuccine, so I'll stop at the 2nd lowest setting. By this time you pasta sheet should be smooth and long.

Lightly dust your pasta sheet with flour. Now cut them into your desired length. Since I'm making fettuccine noodles, I'll cut them into about 9" sheets.

One at a time, I'll run the sheets through the fettuccine attachment on my pasta machine.

Lay you noodles on a flat surface or if you have a pasta rack, that would be best. I don't have one, so I lay them out flat and sprinkle them with a little corn meal. This will prevent the noodles from sticking together.

OK, now that the noodles are done, you can cook them now. Bring a large pot of generously salted water to a boil. Put the fresh pasta in. Remember, IT'S FRESH! It only has to boil for about 3 min for a nice aldente noodle. If you don't want to cook the pasta now. Let it dry for about 25 to 30 min, then roll the pasta into a round nest like shape, put it in tupperware, and freeze it till you are ready to cook the noodles. It will take an extra minute or two if the pasta is frozen.
Now top with your favorite (homemade!) sauce and enjoy!
2 cups all purpose flour
2 large eggs
salt
1 tbsp olive oil
OK, combine all the ingredients in your food processor.

Pulse about 10 to 12 Times. Take a little piece of the dough between your fingers. If it binds together well, (meaning not to dry that it crumbles apart, and not to soft and moist that it is mushy) you are ready to go. If its too dry add a couple of tablespoons of warm water, and pulse a few more times, to get the consistency right. If it's too wet, just add a few more tablespoons of flour. Once you do it a few times it gets easier.
the dough should look like this.

Sprinkle a little flour on a cutting board. Then dump to dough on top.

Now knead the dough into a ball.

Cut the ball in half. Then roll dough out with a rolling pin. About the width of your pasta machine.

Now it's time for the pasta maker! Set your machine on the widest setting. Now feed the dough through. You may have to run it through the widest setting a few times.

Repeat this process, narrowing the setting each time, until you get the desired thickness of your pasta sheets. Today I'm making Fettuccine, so I'll stop at the 2nd lowest setting. By this time you pasta sheet should be smooth and long.

Lightly dust your pasta sheet with flour. Now cut them into your desired length. Since I'm making fettuccine noodles, I'll cut them into about 9" sheets.

One at a time, I'll run the sheets through the fettuccine attachment on my pasta machine.

Lay you noodles on a flat surface or if you have a pasta rack, that would be best. I don't have one, so I lay them out flat and sprinkle them with a little corn meal. This will prevent the noodles from sticking together.

OK, now that the noodles are done, you can cook them now. Bring a large pot of generously salted water to a boil. Put the fresh pasta in. Remember, IT'S FRESH! It only has to boil for about 3 min for a nice aldente noodle. If you don't want to cook the pasta now. Let it dry for about 25 to 30 min, then roll the pasta into a round nest like shape, put it in tupperware, and freeze it till you are ready to cook the noodles. It will take an extra minute or two if the pasta is frozen.
Now top with your favorite (homemade!) sauce and enjoy!
Marinara Sauce
Ok, back to basics. Marinara sauce. Everyone has a different take on a red sauce. Here is mine. This is the same recipe I've used for years at my restaurant. Remember any good sauce has to simmer low and slow for several hours to really bring all the flavors together. Here's what you will need:
2 28 oz cans of San Marzano whole peeled tomatoes
1 Med Spanish onion Diced
1 small can tomato paste
6 cloves of garlic smashed and finely diced
3 oz Italian Flat Leaf Parsley finely chopped
3 oz Fresh Basil finely chopped
1 oz dried oregano
3 oz freshly grated parmesan cheese
Salt
Fresh Ground Black Pepper
1 Cup dry white wine (use something you would Drink)
1 cup chicken stock
olive oil
Coat the bottom of a large sauce pot with olive oil. Bring heat to med/high. Add onions. Sprinkle with salt and sweat for 3 min. Add Garlic and cook for an additional 2 min. Add parsley, basil, oregano, wine, and chicken stock. Bring heat up and simmer for 4 to 5 min.

Now it's time for the star! Put the tomatoes in a food processor. Pulse 5 to 6 times. Don't blend the tomatoes into NOTHING! You want a chunky consistency. Now add the tomatoes to the pot along with the tomato paste. Stir thoroughly with a wooden spoon. Add the parmesan and salt and pepper to taste. Now the waiting game. Reduce the heat to low. Let the sauce simmer for at least 3 hours. 5 is better.

When finished you can use it for pasta, lasagna, any kind of parmesan dishes. It's probably to most useful sauce to have around. If you have extra, put leftover sauce in in a tuperware container and freeze until you need it. There can never be too much sauce!
Monday, September 19, 2011
Turkey Chili
My wife, Monica is always asking me to make some healthier foods. So I try to come up with some great recipes that are good for you without losing great taste. This Turkey Chili recipe is all that and more. This recipe is only slightly complicated because it has a lot of ingredients, but believe me, it is worth it!
Here is what you will need:
2 lbs Ground Turkey
1 green bell pepper
1 red bell pepper
2 Jalapeno peppers
2 Serano chili peppers
1 medium Spanish onion
4 cloves garlic
4 tablespoons oil (vegetable or olive)
4 tbsp Cumin
4 tbsp paprika
4 tbsp chili powder
1 tbsp cayenne pepper
1 tbsp onion powder
1 tbsp garlic powder
3 cups chicken broth
2 6oz cans tomato paste
1 15.5oz can garbanzo beans
salt & pepper
scallions, cheddar cheese, grilled baguette for garnish

Now we are ready to start! First dice all the peppers, onions and smash and chop the garlic. If you like a spicy chili you can leave the seeds from the Jalapeno & Serano chili's. If you don't like that much heat, scrape the seeds out with a knife. Use gloves when working with any hot chili peppers, because if you touch your face or eyes it will burn in a way you won't soon forget. Now, in a deep skillet add 2 tbsp of oil and turn to medium high heat. When oil is hot, add the ground turkey. Cook turkey until nicely browned and no pink is showing. Turn heat off and let the meat rest, In a medium to large stock pot add the remaining 2 tbsp of oil and turn heat to medium high. When the oil reaches temperature, add the peppers and onions and sautee for about 3 to 4 minutes. Now add the Garlic and sautee for another 2 min until vegetables are soft.


Once the vegetables are soft, add the cooked ground turkey to the stock pot. Turn heat to med/low. Now add all of your spices. With a wooden spoon stir all the ingredients together. Once stired, add the chicken broth, tomato paste, and garbanzo beans. Stir ingredients again. Now cover the pot with a lid and turn heat to low. Simmer your chili for about an hour and a half to really bring all the flavor elements together.

Now it's time for serving! I like to cut a french baguette in half and drizzle with olive oil, then grill face down on cast iron grill pan. It leaves really nice, professional grill marks on the bread. Now Season your chili w/ salt and pepper and plate in a nice bowl. Sprinkle w/ a nice sharp cheddar cheese and some chopped scallions. Serve w/ the grilled baguettes or some good tortilla chips. You are now ready to enjoy a health and delicous Meal!

Here is what you will need:
2 lbs Ground Turkey
1 green bell pepper
1 red bell pepper
2 Jalapeno peppers
2 Serano chili peppers
1 medium Spanish onion
4 cloves garlic
4 tablespoons oil (vegetable or olive)
4 tbsp Cumin
4 tbsp paprika
4 tbsp chili powder
1 tbsp cayenne pepper
1 tbsp onion powder
1 tbsp garlic powder
3 cups chicken broth
2 6oz cans tomato paste
1 15.5oz can garbanzo beans
salt & pepper
scallions, cheddar cheese, grilled baguette for garnish
Now we are ready to start! First dice all the peppers, onions and smash and chop the garlic. If you like a spicy chili you can leave the seeds from the Jalapeno & Serano chili's. If you don't like that much heat, scrape the seeds out with a knife. Use gloves when working with any hot chili peppers, because if you touch your face or eyes it will burn in a way you won't soon forget. Now, in a deep skillet add 2 tbsp of oil and turn to medium high heat. When oil is hot, add the ground turkey. Cook turkey until nicely browned and no pink is showing. Turn heat off and let the meat rest, In a medium to large stock pot add the remaining 2 tbsp of oil and turn heat to medium high. When the oil reaches temperature, add the peppers and onions and sautee for about 3 to 4 minutes. Now add the Garlic and sautee for another 2 min until vegetables are soft.
Once the vegetables are soft, add the cooked ground turkey to the stock pot. Turn heat to med/low. Now add all of your spices. With a wooden spoon stir all the ingredients together. Once stired, add the chicken broth, tomato paste, and garbanzo beans. Stir ingredients again. Now cover the pot with a lid and turn heat to low. Simmer your chili for about an hour and a half to really bring all the flavor elements together.
Now it's time for serving! I like to cut a french baguette in half and drizzle with olive oil, then grill face down on cast iron grill pan. It leaves really nice, professional grill marks on the bread. Now Season your chili w/ salt and pepper and plate in a nice bowl. Sprinkle w/ a nice sharp cheddar cheese and some chopped scallions. Serve w/ the grilled baguettes or some good tortilla chips. You are now ready to enjoy a health and delicous Meal!
Hi guys, my name is Tommy Haley and I'm starting a food blog. I've been in the restaurant business for almost 20 years. So I've decided to start a food blog. It will consist of some of my best recipes I've learned over the years, as well tasting and reviewing foods from local and famous restaurants and food hotspots. I am doing this not only to share with others, but to prepare for my next restaurant venture, hopefully coming soon! Enjoy. If you have any questions or suggestions, feel free to ask. Thanks again!
Subscribe to:
Posts (Atom)